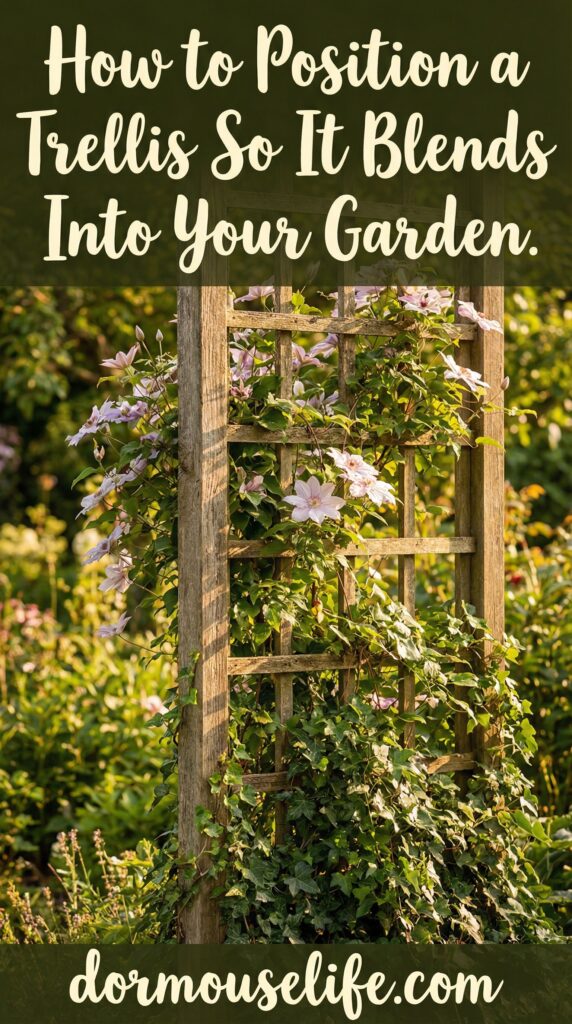
How to Position a Trellis So It Blends Into Your Garden
A garden trellis can be so much more than plant support. Done well, it becomes a quiet focal point, adds height and structure, and makes your outdoor space feel intentional rather than cluttered.
This post may contain affiliate links, which means I’ll receive a commission if you purchase through my link, at no extra cost to you. Please read full disclosure here.
The key is choosing and placing a trellis so it looks like it has always belonged there. With a bit of planning, you can integrate a trellis seamlessly into your garden, turning bare walls or awkward corners into your favorite views.
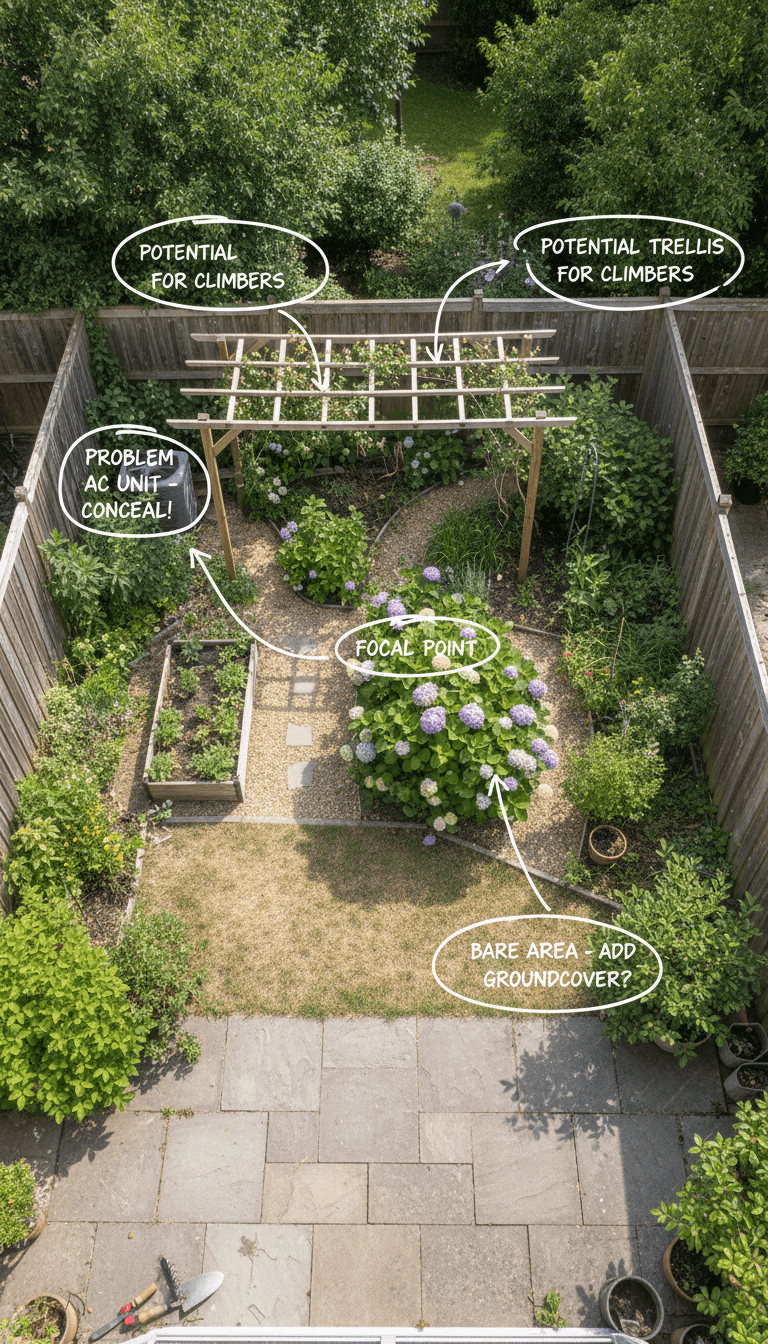
Start With the Purpose and the View
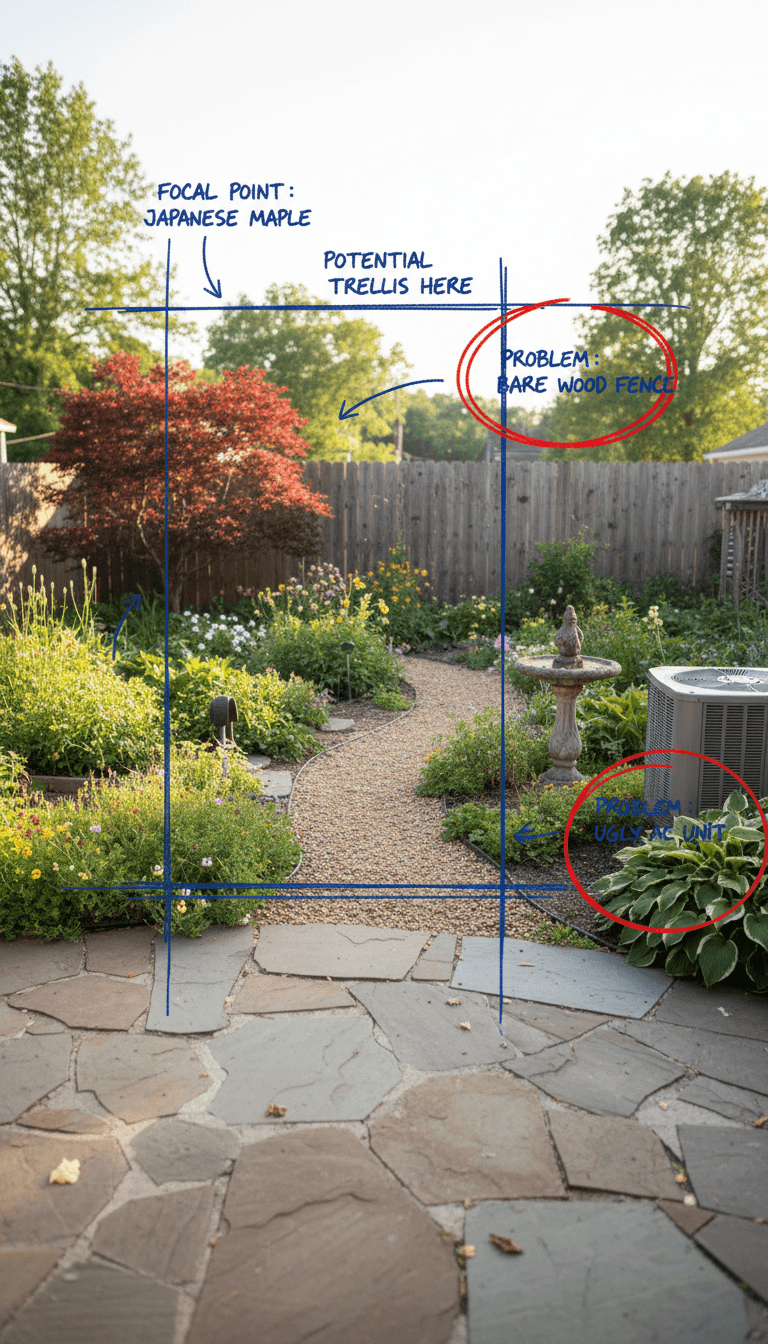


Before you buy anything, get clear on what you want the trellis to do. This shapes every decision that follows and prevents it from looking random or out of place.
Think about whether the trellis is meant to:
- Hide a fence, AC unit, or compost area
- Frame a view or create a sense of entry
- Add height and structure to a flat planting bed
- Support specific climbing plants you already love
Then, look at your garden from key vantage points: your patio, kitchen window, or favorite chair. Notice where your eye naturally rests and where a vertical element would feel balanced, not intrusive.
Action tip: Stand in three main “view spots” and snap quick photos; mark on the photos where a trellis could enhance the view or disguise an eyesore.
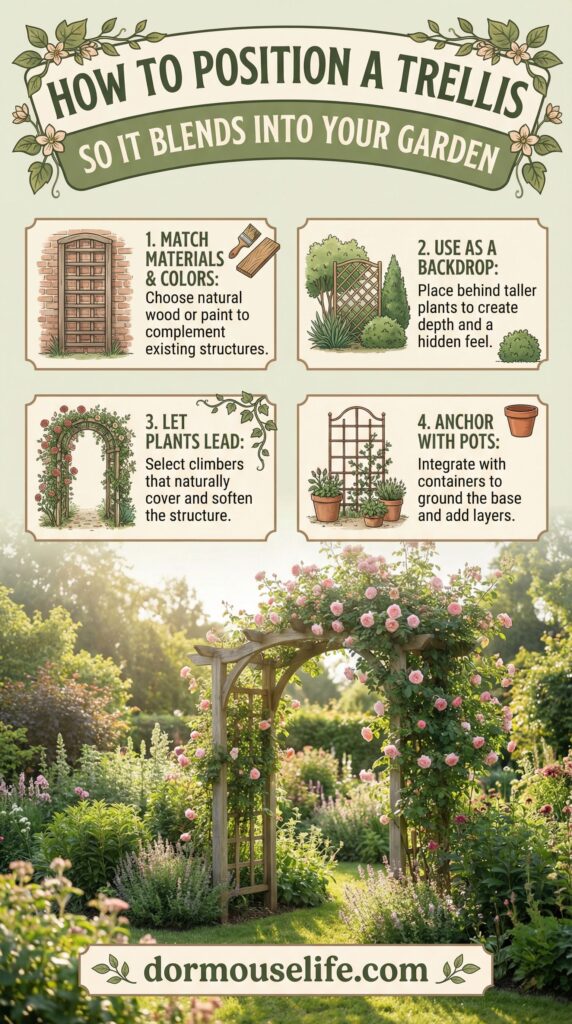
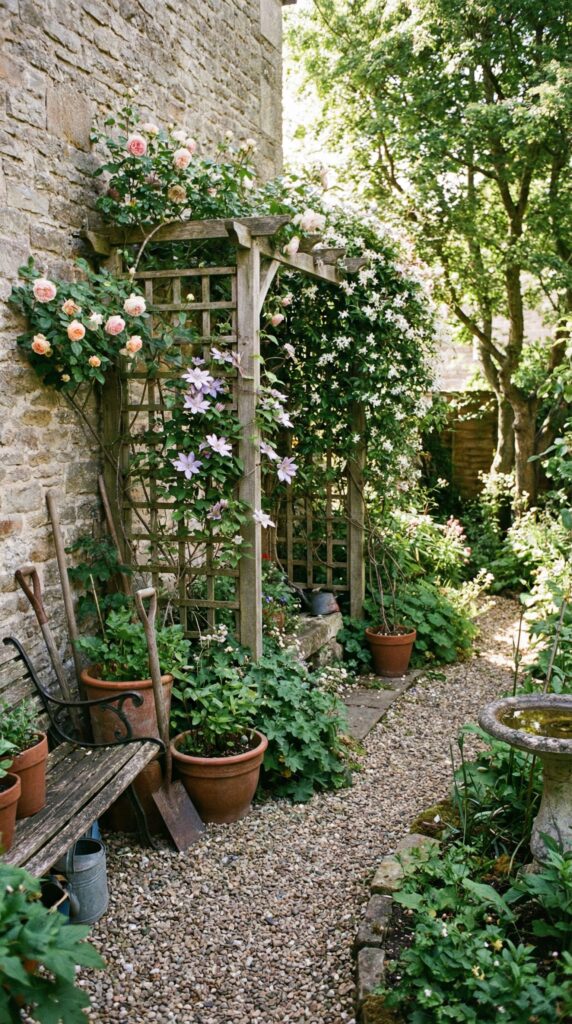
Choose a Style That Matches Your Garden’s Character
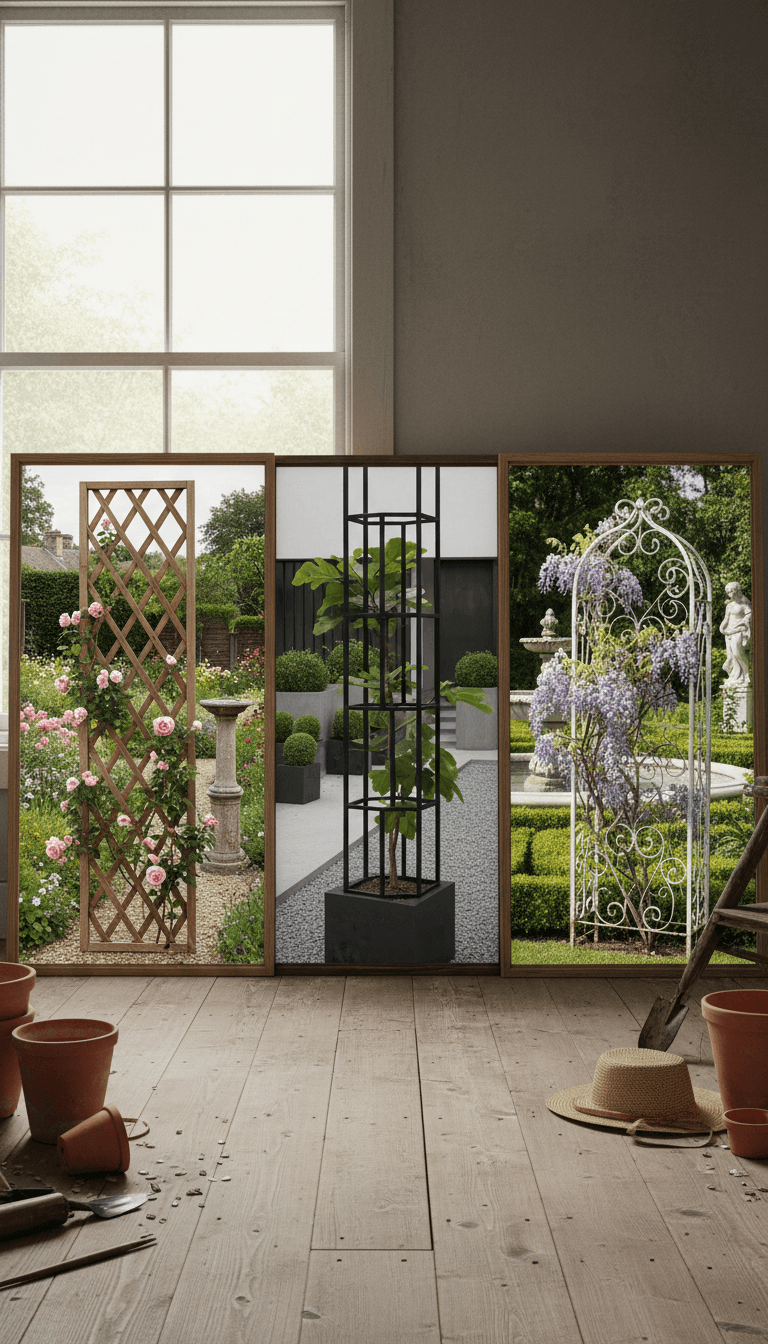
A trellis should echo the mood and materials of your existing space, not fight with them. Matching style and color to your home and garden helps the trellis feel like a natural extension.
Use your surroundings as a guide:
- For cottage or farmhouse gardens: Choose wood trellises with simple crisscross (lattice) or fan shapes
- For modern spaces: Look for clean-lined metal or cable trellises in black, charcoal, or stainless steel
- For traditional or formal gardens: Opt for structured, symmetrical designs like arched or obelisk trellises
- For small balconies or courtyards: Consider slim wall-mounted grids that don’t overwhelm
Color matters too. You can:
- Match your fence or trim color for a subtle, blended look
- Go slightly darker than your wall or fence so plants and flowers pop
Action tip: Take a photo of your garden and hold up trellis options (on your phone or printed) against it to see which shapes and colors visually “disappear” into the scene.
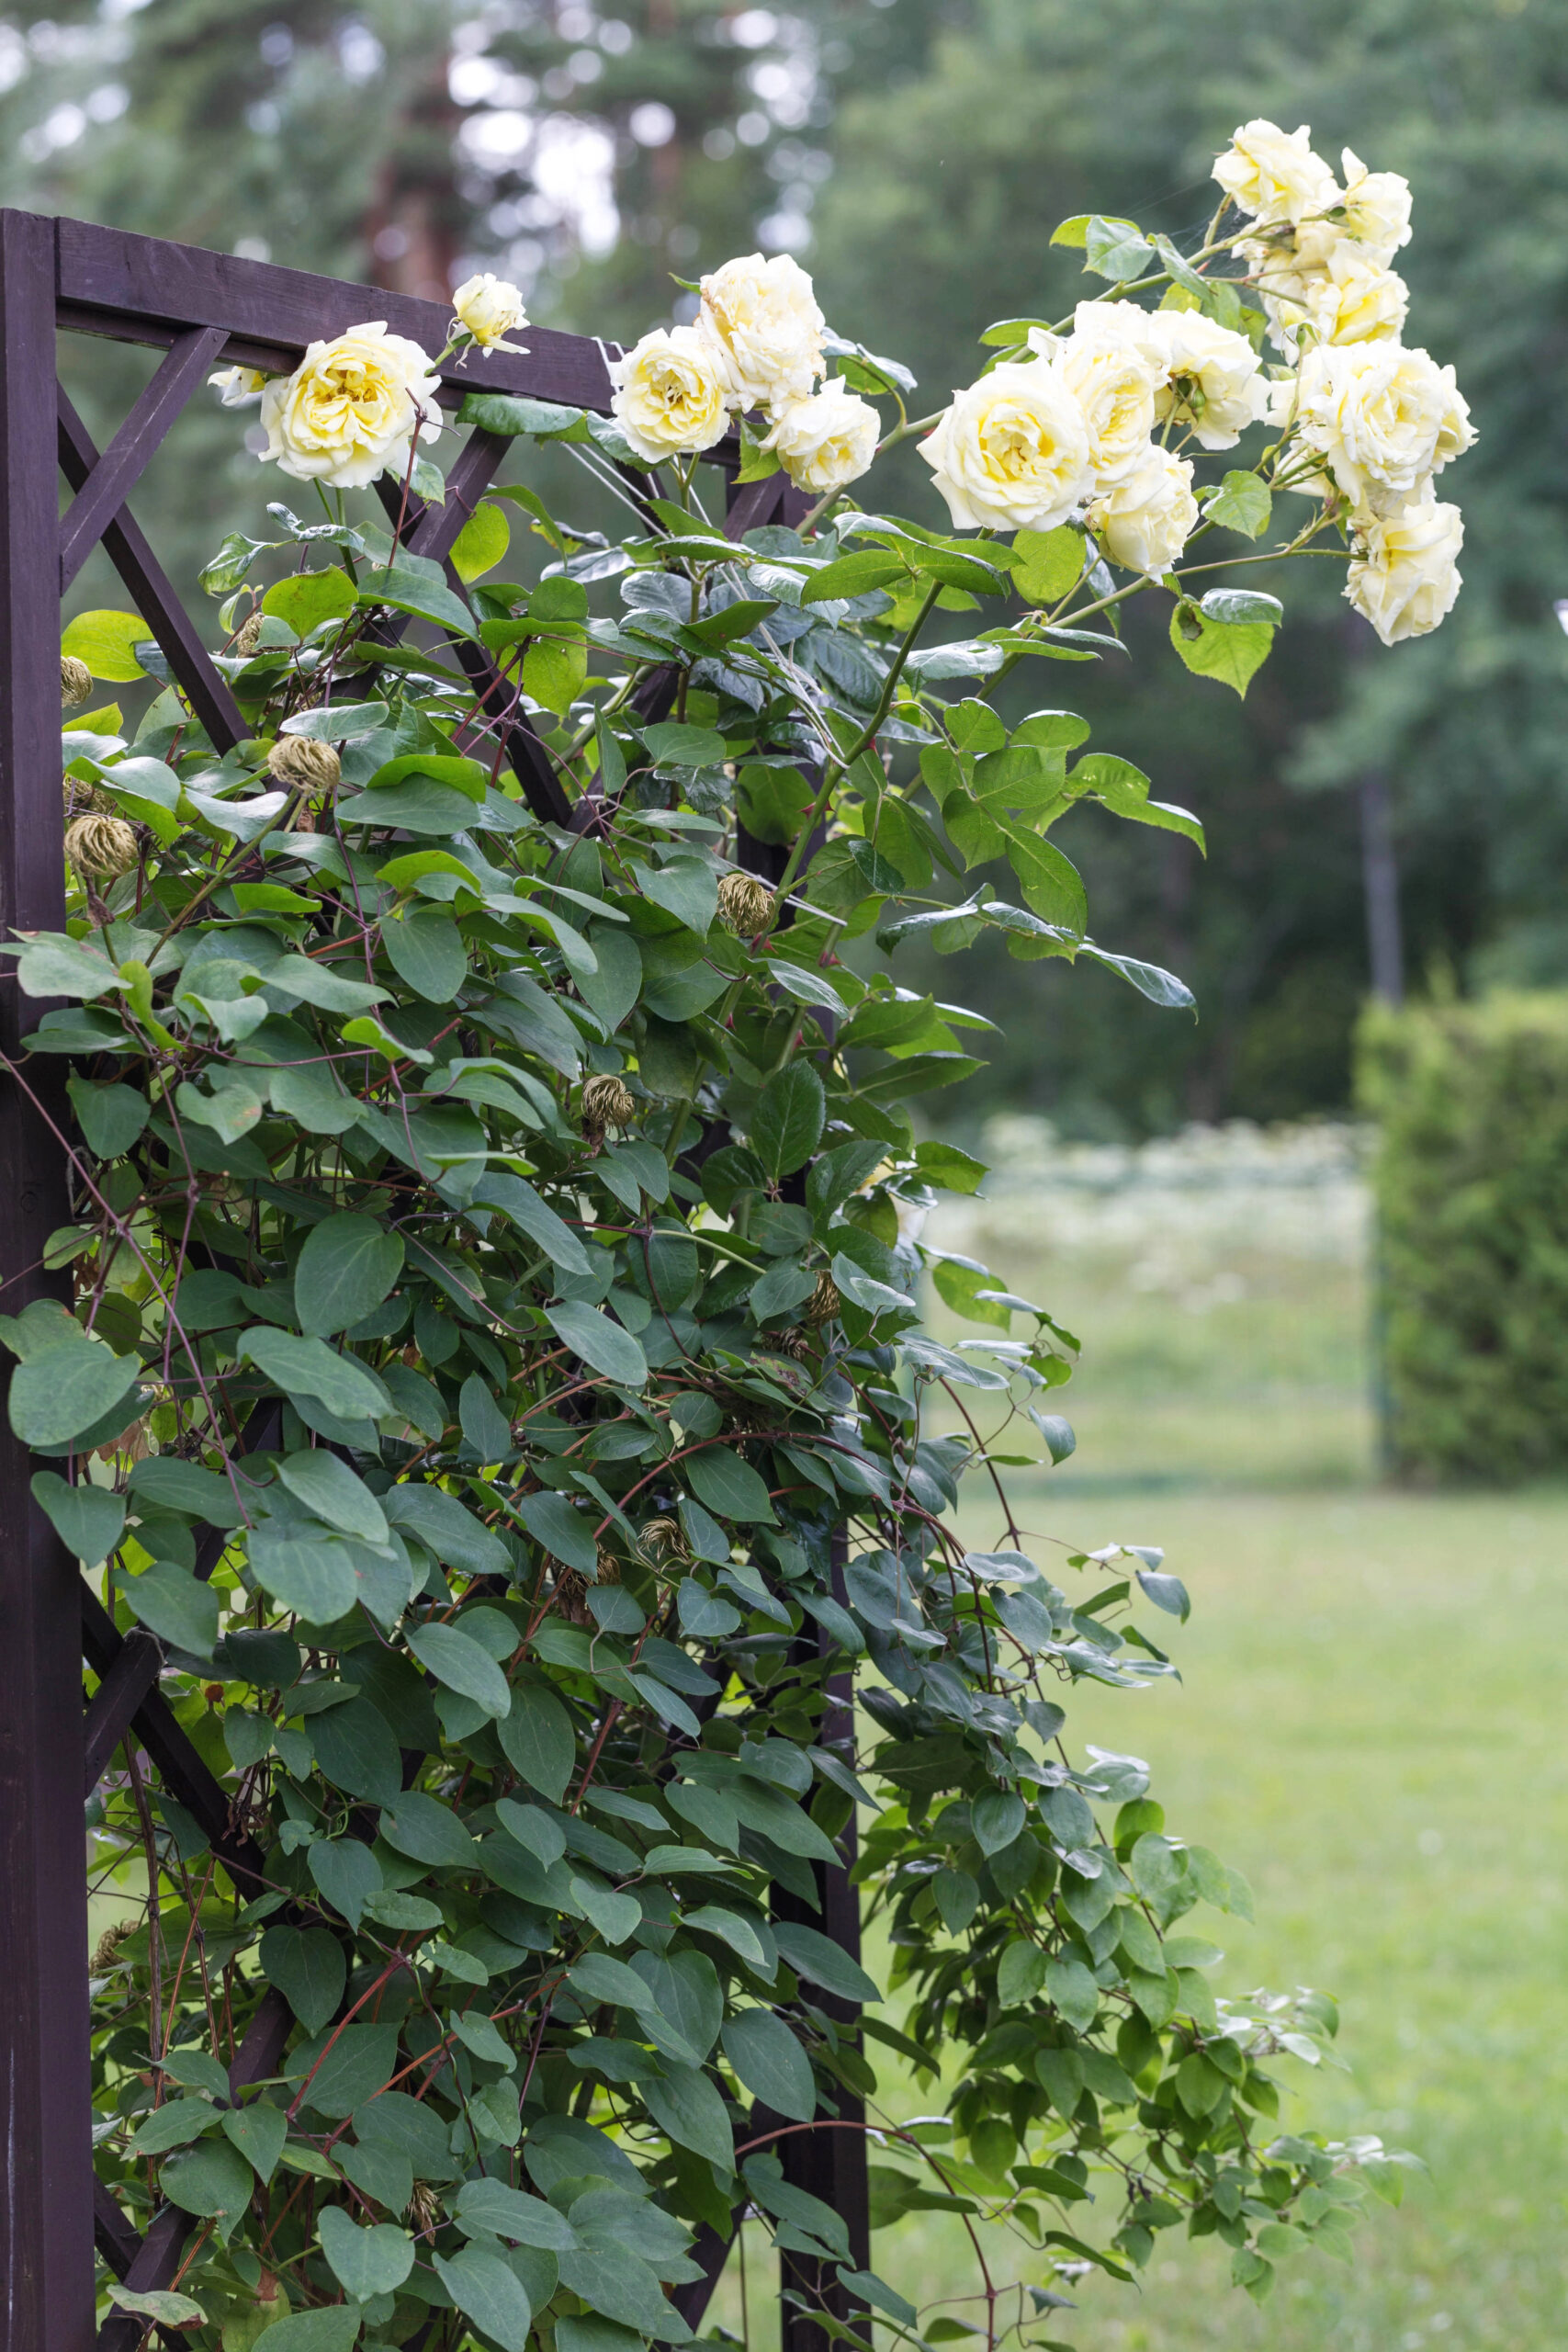
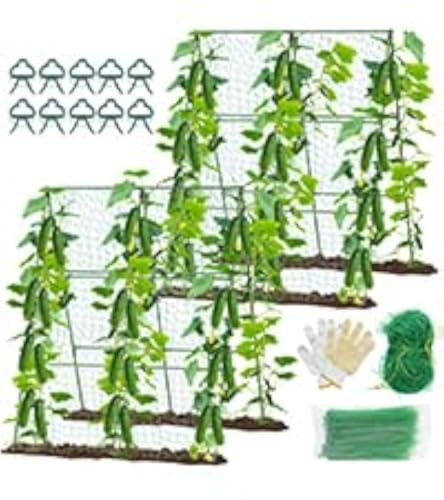
Pair the Trellis With the Right Climbing Plants
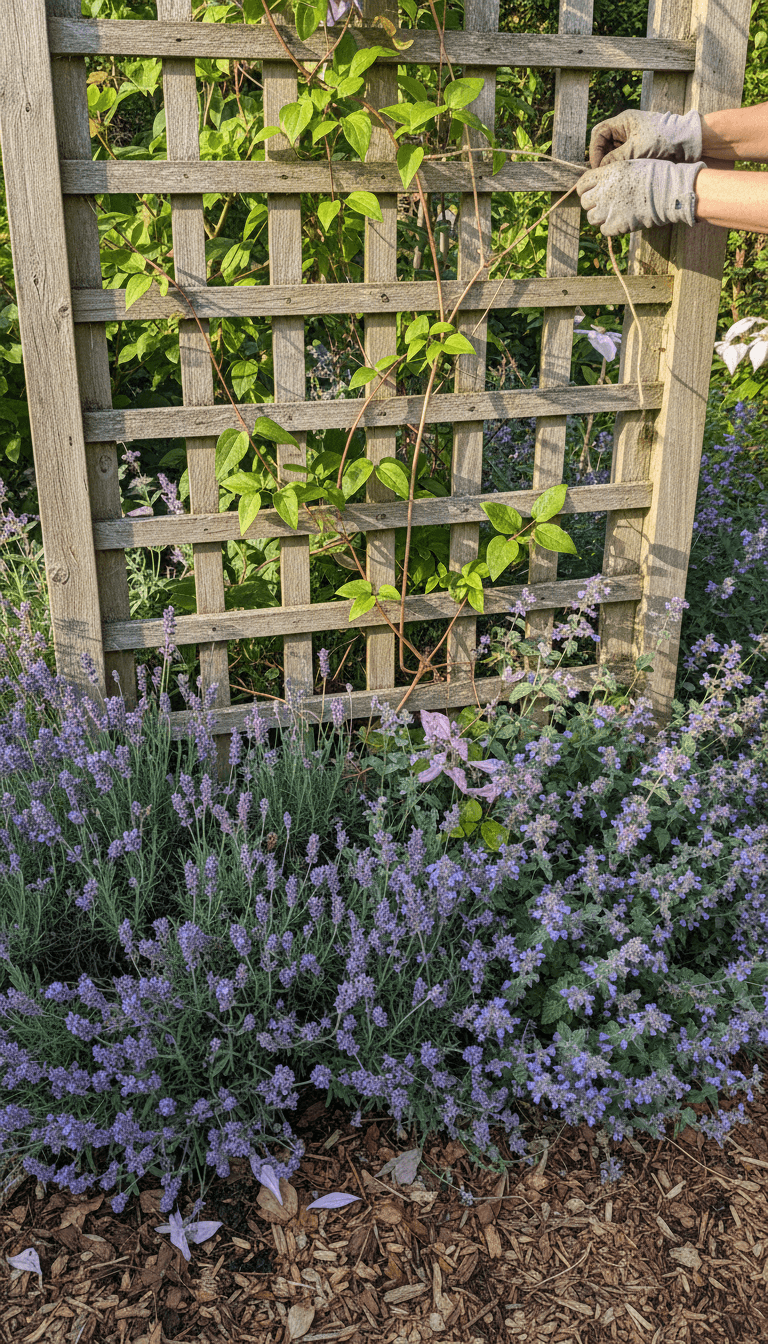
Plants are what truly knit a trellis into the garden. Matching growth habit, weight, and bloom time to your trellis and climate ensures it looks lush instead of messy or bare.
Consider these plant–trellis pairings:
- Light, delicate trellises: Sweet peas, clematis, morning glories
- Stronger metal or wood frames: Climbing roses, wisteria, grapes
- For privacy: Evergreen climbers like star jasmine or ivy (in check), or fast growers like honeysuckle
- For small spaces: Compact varieties of clematis or climbing roses
Plant placement is just as important:
- Set plants 6–12 inches away from the trellis base so roots aren’t cramped
- Angle young stems gently toward the trellis and loosely tie them with soft twine or plant clips
- Mix in low, mounding plants at the base to soften where the trellis meets the soil
Action tip: Choose one primary climber and one low, complementary plant (like lavender, catmint, or small grasses) to anchor the base so the trellis doesn’t look like it’s “floating.”
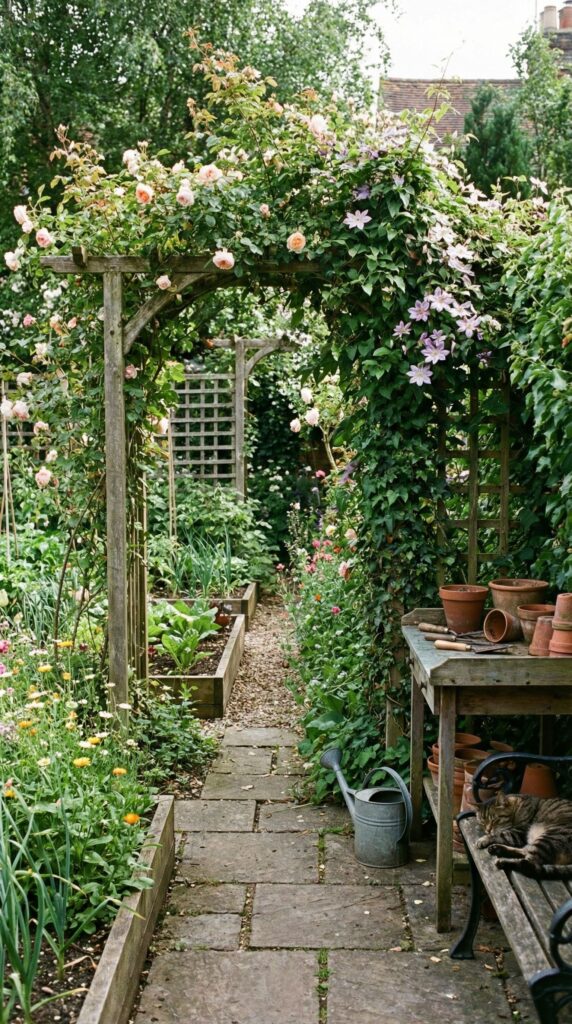
Place and Anchor for a Natural, Built-In Look
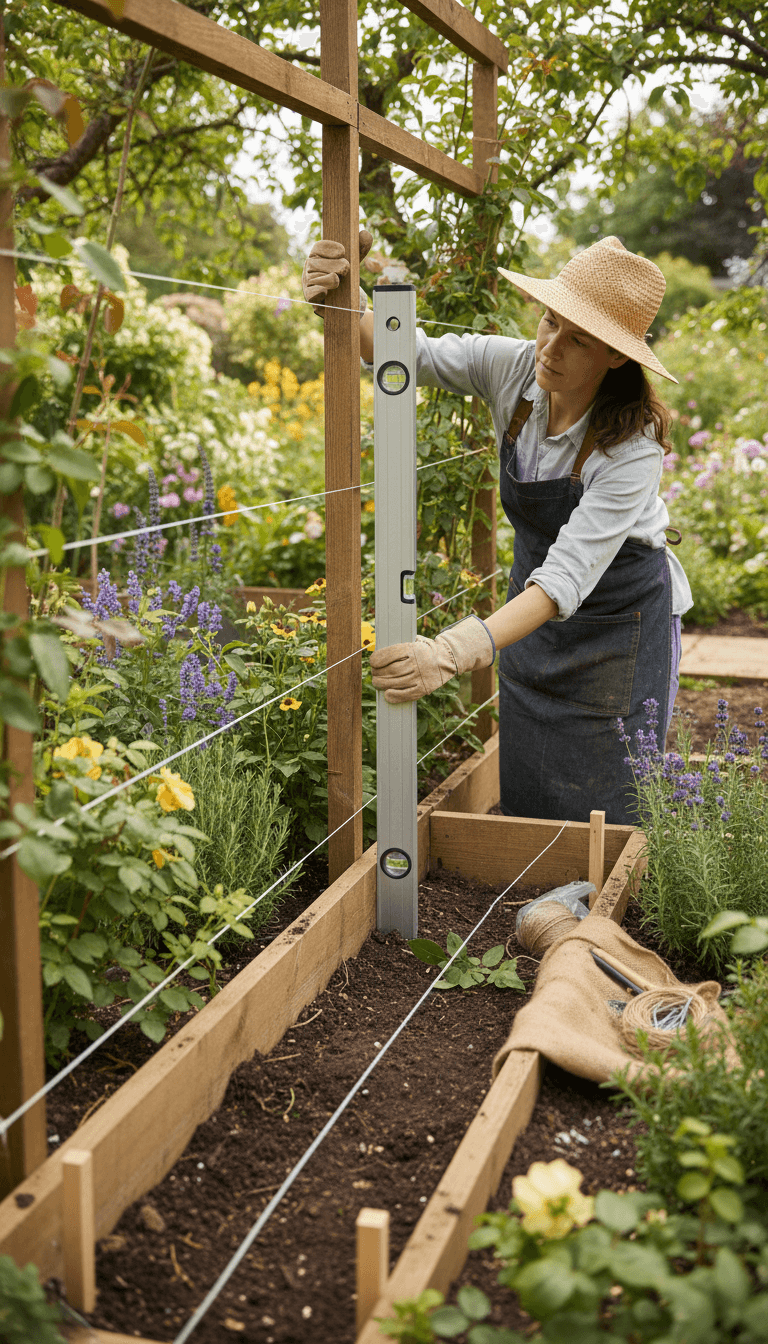
Even a beautiful trellis can look awkward if it’s placed too randomly or not properly secured. Thoughtful positioning helps it feel like part of the garden’s structure.
Use these placement principles:
- Align trellises with existing lines: fences, paths, or the edge of a bed
- Avoid placing them dead-center unless they’re meant to be a strong focal point
- Stagger heights if using more than one, so your eye moves gently through the space
- Keep scale in mind: taller trellises for longer fences, smaller ones for tight corners

Secure installation keeps everything safe and tidy:
- Sink posts into the ground with concrete or use ground spikes for freestanding types
- For wall-mounted trellises, use proper masonry or exterior screws and leave a small gap between trellis and wall for air circulation
- Check that the trellis is truly vertical and not leaning before planting
Action tip: Lay out your trellis position with a garden hose or string first; step back and adjust until the height and placement feel balanced from multiple angles.
Layer in Finishing Touches So It Feels Intentional
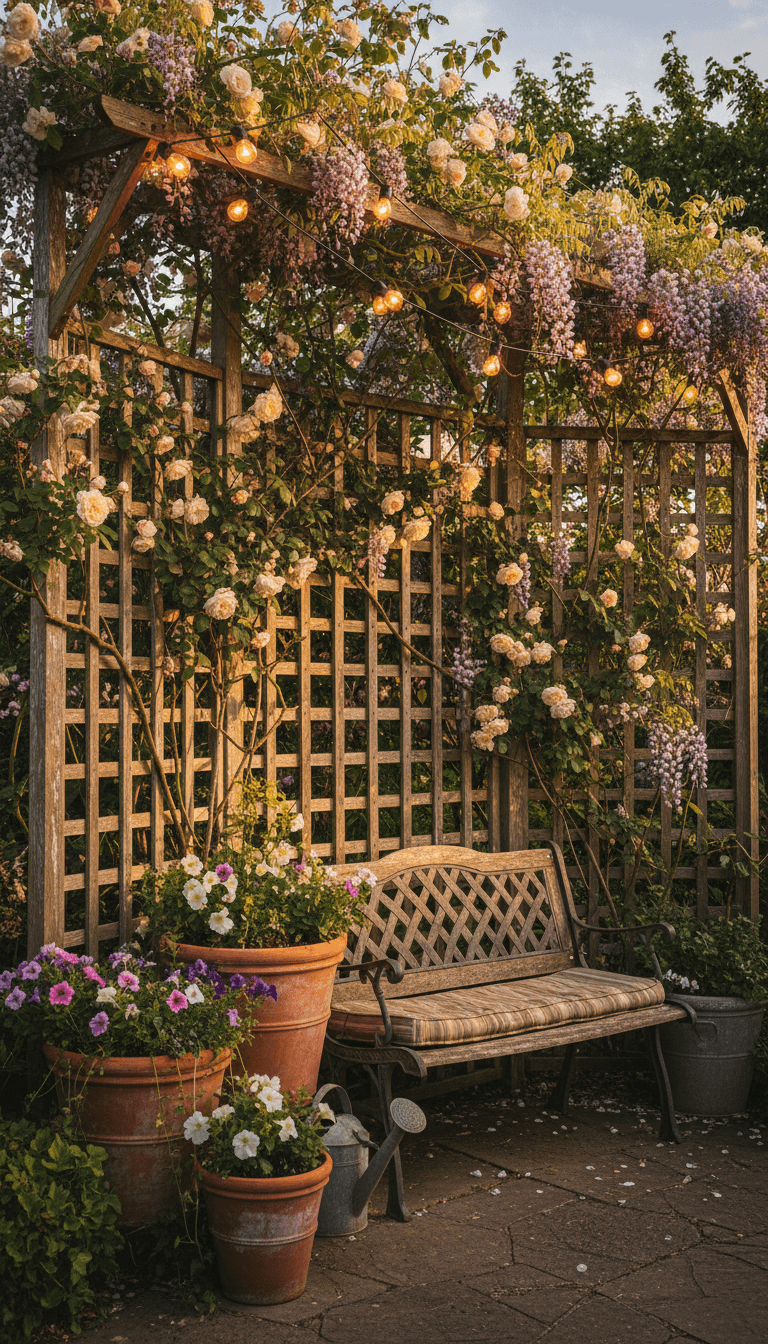
Small details around the trellis make it feel integrated rather than like an afterthought. Think of it as styling a vignette in your garden.
Simple ways to finish the look:
- Add a mulch or gravel edging at the base to define the area
- Place a bench, small bistro set, or garden stool nearby to invite lingering
- Repeat a material or color from the trellis in another element (a planter, lantern, or fence)
- Use low solar lights or string lights to softly outline the shape in the evening
Regular care also keeps the trellis looking deliberate:
- Prune climbers to follow the trellis shape instead of sprawling wildly
- Remove dead or tangled stems at least once a season
- Refresh paint or wood stain as needed so it doesn’t look neglected
Action tip: Choose one nearby element—a pot, cushion, or light fixture—and match its color or material to your trellis to visually tie the whole scene together.
Additional Images
Conclusion
When you treat a trellis as part of your garden’s architecture rather than just a plant support, it starts to feel naturally rooted in the space. By clarifying its purpose, matching the style to your garden, pairing it with the right climbers, and paying attention to placement and finishing touches, you turn a simple structure into a quietly beautiful feature.
Start with one thoughtfully placed trellis, let the plants knit around it over a season or two, and you’ll see how a well-integrated vertical element can make your whole garden feel more complete and inviting.