25 Home Made Christmas Decorations Ideas Made of Pine Cones for a Festive Touch
Getting into the holiday spirit can be a lot of fun, especially when you create your own decorations. Pine cones are a fantastic and natural material that you can easily turn into beautiful ornaments and festive decor. You can make your home cozy and inviting with these 25 homemade Christmas decorations ideas made of pine cones.
This post may contain affiliate links, which means I’ll receive a commission if you purchase through my link, at no extra cost to you. Please read full disclosure here.
These simple crafts are perfect for all ages and skill levels, allowing you to enjoy quality time with family or friends. Not only will you save money by making your own decorations, but you’ll also add a personal touch to your holiday celebrations.
1) Pine Cone Wreath with Glitter
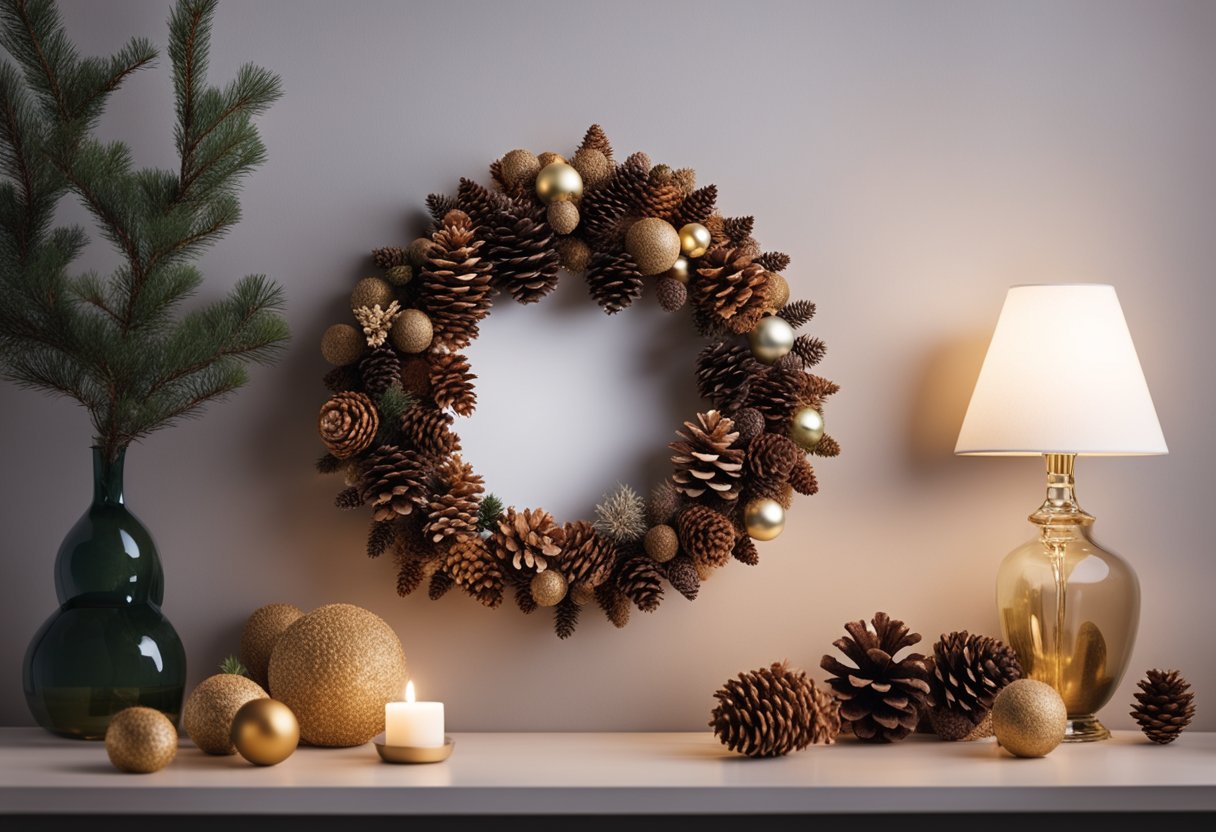
Creating a pine cone wreath with glitter is a fun way to add sparkle to your holiday decor. Start by gathering pine cones, a sturdy wreath base, and some craft glue.
Next, apply glue to the pine cones and generously sprinkle glitter over them. This step can get a bit messy, so have a tray underneath to catch excess glitter.
Once the glitter dries, attach the pine cones to the wreath base. Arrange them however you like for a unique look. Hang it up and enjoy your dazzling creation!
2) Painted Pine Cone Ornaments
Painting pine cones is a fun and easy way to create unique ornaments for your Christmas tree. Start by gathering some pine cones and choose a color scheme that fits your holiday decor.
You can use acrylic paint for a bright and durable finish. Try painting the tips with gold or silver for a festive touch. Once dry, attach a string or ribbon for hanging.
For added flair, use glitter or Mod Podge to give your ornaments some sparkle. These painted pine cone ornaments will add a personal touch to your holiday decorations.
3) Pine Cone Elf Decorations
Pine cone elf decorations are a fun way to add some holiday cheer to your home. You can easily make them with a few simple materials. Get some pine cones, wood beads, and pipe cleaners.
Start by gluing the wood bead on top of the pine cone for the head. Then, use faux fur or fabric as a hat. You can also add twigs for arms and cute little acorn caps for ears.
These little elves look adorable on your mantel or in holiday displays. Plus, making them can be a great activity with kids. Enjoy your crafting!
4) Pine Cone Tree Centerpiece
Creating a pine cone tree centerpiece is a fun project for your holiday table. You’ll need whole pine cones, a Styrofoam cone, and floral wire.
Start by attaching the pine cones to the Styrofoam using the wire. Fill in any gaps with smaller pine cones or other festive decorations.
This centerpiece looks great and adds a rustic touch to your Christmas decor. Plus, it’s easy to customize with paint or glitter for extra sparkle.
5) Pine Cone Door Hanger
Creating a pine cone door hanger is a fun and simple project. You’ll need a few pine cones, some ribbon, and maybe a little paint for extra flair.
Start by selecting some pine cones and cleaning them if needed. You can paint them in festive colors or leave them natural.
Next, tie a ribbon around the top of the cone. You can hang it directly on your door or attach it to a wreath for added decoration. This charming piece will welcome guests during the holiday season.
6) Snowy Pine Cone Garland

Making a snowy pine cone garland is a fun way to bring a winter vibe to your home. Gather some pine cones from your yard or a nearby park.
You can paint them white to resemble snow, or sprinkle them with white glitter for a sparkling effect. String them together using twine or fishing line, spacing them out evenly.
Add some faux snowflakes or small ornaments in between for extra flair. This simple decoration will look great on your mantel or across your windows. Enjoy your cozy, DIY creation!
7) Pine Cone Candle Holders
Pine cone candle holders are simple and charming. You can create a rustic look for your home with just a few materials.
Start by selecting a large pine cone. Glue a small candle on top, making sure it’s secure. You can use tea lights or taper candles.
Place your new candle holders around your home. They look great on tables or as part of a centerpiece. You can also paint or decorate the pine cones to match your holiday theme.
These candle holders add a warm glow to your space, making your home feel festive.
8) Pine Cone Reindeer
Creating pine cone reindeer is a fun and easy craft for all ages. Gather some pine cones, pipe cleaners, and glue to get started.
First, cut the pipe cleaners into smaller pieces for the antlers. Shape one piece into an L-shape and wrap another piece around it to form the antler.
Next, insert the antlers into the top of the pine cone. You can also glue on googly eyes and a small red pom-pom for the nose.
These charming decorations will add a festive touch to your home!
9) Pine Cone Bird Feeder
Making a pine cone bird feeder is fun and easy. First, collect a pine cone from your yard or a nearby park.
Next, tie a string or twine around the top. This will help you hang your feeder later.
Now, spread peanut butter over the pine cone. You can also roll it in birdseed for extra flavor.
Hang it outside on a tree branch and watch the birds enjoy!
10) Mini Pine Cone Christmas Trees
Creating mini pine cone Christmas trees is a fun project. You can use small pine cones as the base for your trees.
Start by gathering different sizes of pine cones. You can stack them or glue them together for a unique look.
Add decorations like beads, glitter, or small felt balls. This makes your trees pop with color and charm.
Place them on your mantel or as a table centerpiece. They bring a cozy and festive touch to your home.
11) Pine Cone Place Cards
Pine cone place cards are a fun and simple way to dress up your holiday table. Start by choosing small pine cones and give them a clean look by removing any dirt.
Use small card stock or paper to create tags for each guest. Write their names on the tags and slide them into the pine cones.
You can also add a bit of holiday flair by using ribbons or twine to tie a small bow around the base. This adds a nice touch and makes it even more festive.
12) Pine Cone Angels
Making pine cone angels is a fun and creative way to bring some charm to your holiday decor. You only need a few supplies to get started.
Use pine cones as the body and add lace for wings. A small wooden bead works perfectly for the head. You can even paint the pine cones or add glitter for a festive touch.
These angels can be hung on your Christmas tree or placed around your home. They add a rustic feel to your decorations and are easy to make with kids. Enjoy crafting your own pine cone angels this holiday season!
13) Pine Cone Santa Claus
Making a Pine Cone Santa Claus is a fun and easy craft. Start with a medium-sized pine cone for the body.
Use red felt for Santa’s hat and coat. Cut out a triangle for the hat and a rectangle for the coat. Glue them onto the pine cone.
Add cotton balls for Santa’s beard and pom-poms for his hat. You can use googly eyes to give him a friendly face.
This decoration will add a festive touch to your home for the holidays.
14) Pine Cone Owls
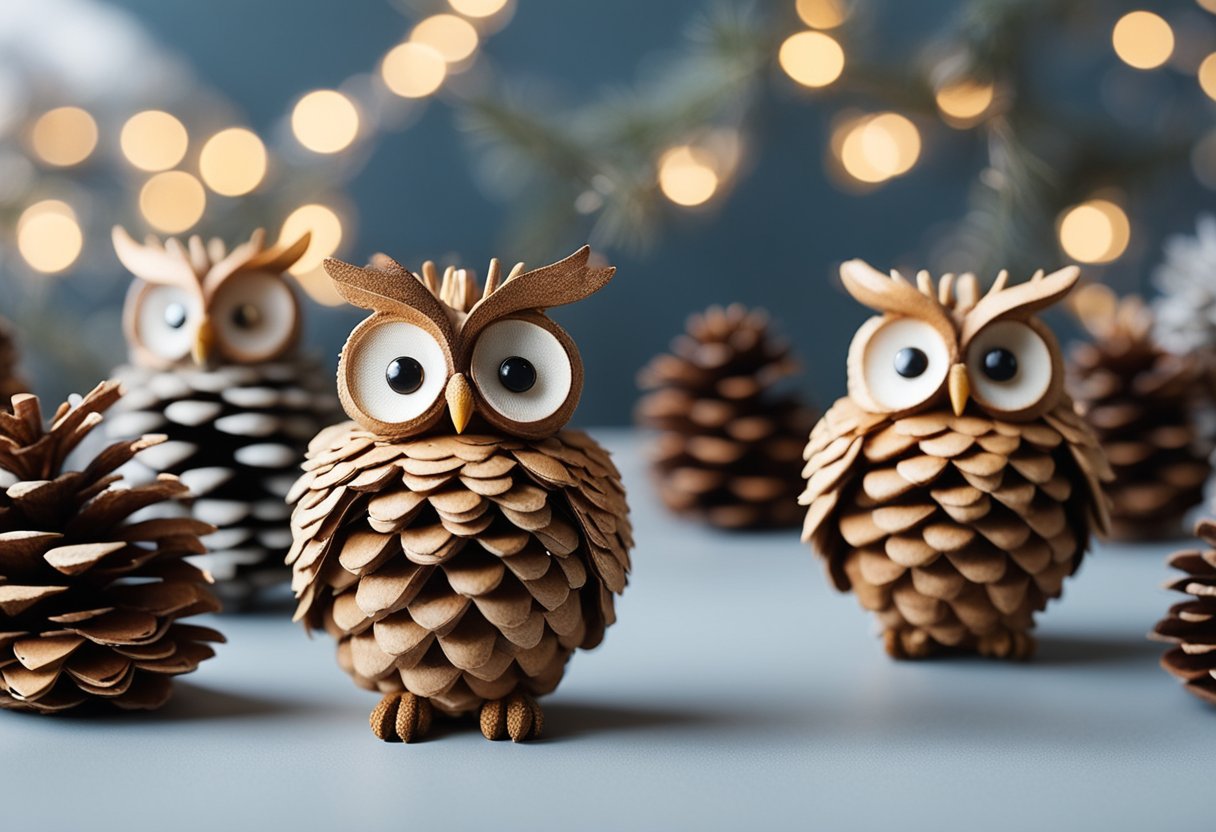
Making pine cone owls is a fun and simple craft. Start with a pine cone as the body. You can use felt or paper to create eyes and wings.
Add a beak for some personality. You can also make little claws using small pieces of paper or felt.
Once you have everything, glue it all together. These cute owls can hang on your tree or sit on a shelf for a festive touch!
15) Pine Cone Gnome Decorations
Making pine cone gnomes is a fun and easy Christmas craft. You only need a pine cone, fabric for the hat, and a small pom-pom for the nose.
Start by cutting the fabric into a circle to create the hat. Secure the hat on top of the pine cone with hot glue.
Add the pom-pom beneath the hat to form the gnome’s nose. You can decorate your gnomes with different colored hats. Hang them on your Christmas tree or place them around your home for a festive touch.
16) Fragrant Pine Cone Potpourri
Making fragrant pine cone potpourri is a fun and easy project. First, gather your pine cones and make sure they’re clean and dry.
Place the pine cones on a baking sheet and bake them at 200 degrees for about 30 minutes. This will open them up nicely.
Once they’re cool, you can add scents. Mix glue with a few drops of your favorite essential oil. Then, spray or drizzle this mixture onto the pine cones.
You can also toss in some dried orange slices or cinnamon sticks for extra fragrance. Arrange the pine cones in a bowl or a decorative bag.
This simple decor not only smells great but also looks festive!
17) Pine Cone Snowman
Making a pine cone snowman is a fun and easy holiday craft. Start by painting two pine cones white. This will be the body of your snowman.
Next, use a skewer to attach a smaller foam ball as the head. Don’t forget to draw a cute face with a Sharpie! Use dots for eyes and a smile.
You can add a scarf made of string for a festive touch. This project is perfect for kids and adds a charming look to your decorations.
18) Pine Cone Picture Frame
Making a pine cone picture frame is a fun and simple craft. You will need a plain frame, pine cones, and hot glue.
Start by arranging the pine cones around the frame’s edges. Once you’re happy with the look, glue them in place.
You can paint the pine cones or leave them natural for a rustic vibe. This unique decoration will make your photos even more special!
19) Pine Cone Gift Toppers

Pine cone gift toppers add a rustic touch to your presents. They are easy to make and look great on any wrapped gift.
You can use natural pine cones or paint them for a festive look. Simply attach them to the gift using twine or hot glue.
For extra flair, add some glitter, ribbons, or small ornaments. This simple decoration makes your gifts stand out and shows you care.
20) Pine Cone Christmas Stockings
Pine cone Christmas stockings are a fun and unique decoration. You can create these charming stockings using pine cones as a base.
Start by gathering a few large pine cones. You can attach fabric or felt to them to mimic the look of stockings.
Make sure to add some seasonal colors for a festive touch. You can hang these up or place them around your home for a cozy feel.
21) Pine Cone Advent Calendar
Creating a Pine Cone Advent Calendar is a fun way to count down to Christmas. You can use a large pine cone for each day leading up to the holiday.
Simply decorate the pine cones with paint or glitter. Attach small bags or envelopes filled with treats or notes. Hang them on a string or in a decorative spot in your home.
This project is easy and lets you add a personal touch to your holiday decor. Enjoy the festive spirit as you celebrate each day!
22) Pine Cone Garland with Lights
Creating a pine cone garland with lights adds a warm glow to your holiday décor. Start by gathering pine cones and stringing them together with twine.
You can tie the string around the base of each cone for a secure hold. Once your garland is ready, weave in some fairy lights for a magical touch.
Drape it over your mantel, around a doorway, or along a stair railing. It’s a simple way to brighten up any space for the holidays!
23) Pine Cone and Ribbon Ornaments
Pine cone and ribbon ornaments add a charming touch to your holiday decorations. You can easily make them with just a few materials. All you need are some pine cones, colorful ribbons, and a hot glue gun.
Start by choosing your favorite ribbons. Cut them into lengths that suit your decoration style. Then, glue one end of the ribbon to the top of the pine cone.
You can hang these ornaments on your tree or use them as cute accents around your home. Mix different colors and patterns for a fun look!
24) Pine Cone Nativity Scene
Creating a pine cone nativity scene is a fun and meaningful project. You can use different sizes of pine cones for each character.
Start with a larger pine cone for the base, representing the manger. Use smaller pine cones for Mary, Joseph, and baby Jesus.
Add some felt or fabric to create clothing and give each figure a personal touch. You can also use twigs for hay or as a backdrop.
This decoration will not only look great but also remind you of the Christmas story in a unique way.
25) Pine Cone Bells
Making pine cone bells is a fun holiday project. You’ll need some pine cones, jingle bells, and string.
Start by tying a jingle bell to the top of a pine cone using the string. Make sure it’s secured well.
You can paint the pine cone or leave it natural for a rustic look. Hang these decorations around your home or on the tree. Enjoy the cheerful sound they make!
Simple Techniques For Preparing Pine Cones

Preparing pine cones for your Christmas crafts can be a fun process. You’ll need to clean them, dry them properly, and maybe even add some personal touches. Let’s look at how to get your pine cones ready for decorating.
Cleaning And Drying
Before you start crafting, make sure your pine cones are clean. They can sometimes have dirt, bugs, or sap.
- Washing: Rinse them in warm, soapy water. A soft brush can help remove stubborn dirt.
- Rinsing: After washing, rinse them under clean water to get rid of soap.
- Drying: Place them on a towel or in a well-ventilated area. Let them air dry completely.
This helps prevent mold and ensures they’re ready for your projects. If you want them to open up more, you can place them in a warm oven (around 200 degrees Fahrenheit) for about 30 minutes.
Adding Finishings
Once your pine cones are clean and dry, you can add some finishings to make them pop.
- Paint: Acrylic paint works well. You can create a festive look by painting them in holiday colors like red, green, or gold.
- Glitter or Sparkles: For a fun glittery touch, use glue to add glitter.
- Natural Oils: If you want a more rustic look, consider using a natural wood finish or oil.
These finishings can help personalize the pine cones and make them perfect for your holiday decor!
Safety Tips
Safety should always come first when crafting. Here are some tips to keep in mind:
- Wear Gloves: When cleaning and painting, wearing gloves can protect your skin.
- Ventilation: If you’re using paints or sprays, work in a well-ventilated area to avoid inhaling fumes.
- Hot Surfaces: If you use an oven to dry your pine cones, be cautious. Always use oven mitts and avoid touching hot surfaces.
Following these safety tips ensures your crafting experience is enjoyable and safe!
Enhancing Your Pine Cone Decorations

Enhancing your pine cone decorations can make them truly stand out during the holiday season. You can easily add a personal touch by playing with color, incorporating lights, and mixing in other natural materials.
Using Paint And Glitter
To give your pine cone decorations a festive flair, consider using paint and glitter. Start by choosing colors that match your holiday theme. Craft paint works well, and you can create a solid coat or even a sponged effect for texture.
Once the paint dries, sprinkle glitter on top to add some sparkle. For a subtle look, use metallic or fine glitter. For a bold statement, go for vibrant colors. You can also dip the tips of the pine cones in glue and then in glitter for a stylish finish.
Incorporating Lights
Adding lights can elevate your pine cone decorations to a whole new level. Tiny LED string lights are perfect for this. You can wrap them around a group of pine cones or nestle them within a larger arrangement.
Make sure the lights are battery-operated for easy placement. This way, you can decorate anywhere without worrying about outlets. The warm glow will create a cozy atmosphere and highlight the natural beauty of the pine cones.
Combining With Other Natural Elements
Mixing pine cones with other natural elements can create an inviting look. Gather items like twigs, dried flowers, or berries. You can create a stunning centerpiece by arranging these items together in a bowl or on a decorative plate.
Additionally, consider using burlap or twine as accents. Wrapping twine around a cluster of pine cones adds an earthy touch. You can even create a rustic wreath by combining pine cones with leaves and small branches. This adds depth and character to your decorations.

