

How to Make Homemade Weed Killer With 3 Ingredients
Are pesky weeds taking over your garden? You can tackle them easily with ingredients you probably already have at home.
This post may contain affiliate links, which means I’ll receive a commission if you purchase through my link, at no extra cost to you. Please read full disclosure here.
Making homemade weed killer from white vinegar, salt, and washing up liquid is simple and effective.
This natural solution is great if you want to avoid harsh chemicals and keep your outdoor space safe.
With just a few steps, you can create a powerful spray that helps kill unwanted plants without harming the environment.
Curious about how to whip up this easy mix? Stick around, and you’ll find everything you need to know to get started.
Essential Ingredients
To create an effective homemade weed killer, you will need three main ingredients. Each plays a special role in making the solution work well. Here’s what you need to know about them.
White Vinegar: The Primary Component
White vinegar is the star of your weed killer. It has a high acetic acid content, usually around 5-20%. This acidity helps to dry out and kill unwanted plants.
When using white vinegar, aim for the higher concentration if possible. Some people use cleaning vinegar, which contains about 6% acetic acid.
Tip: Spray vinegar on a sunny day. The heat from the sun helps it work even better. Just make sure not to spray it on plants you want to keep.

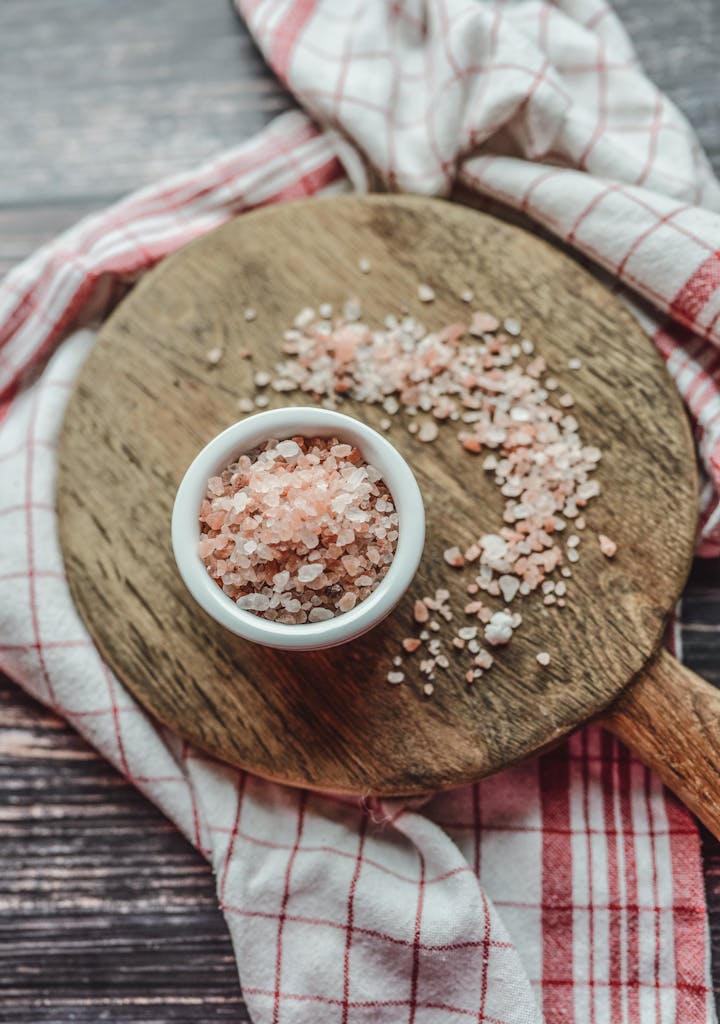
Salt: The Desiccant
Salt is important for drawing moisture out of the plants. When mixed with vinegar, it enhances the effectiveness of your solution.
A typical amount to use is about 1-2 cups of salt per gallon of vinegar. You can use regular table salt or rock salt.
Caution: Salt can harm your soil over time, so use it sparingly. It can make the ground inhospitable for future plants.
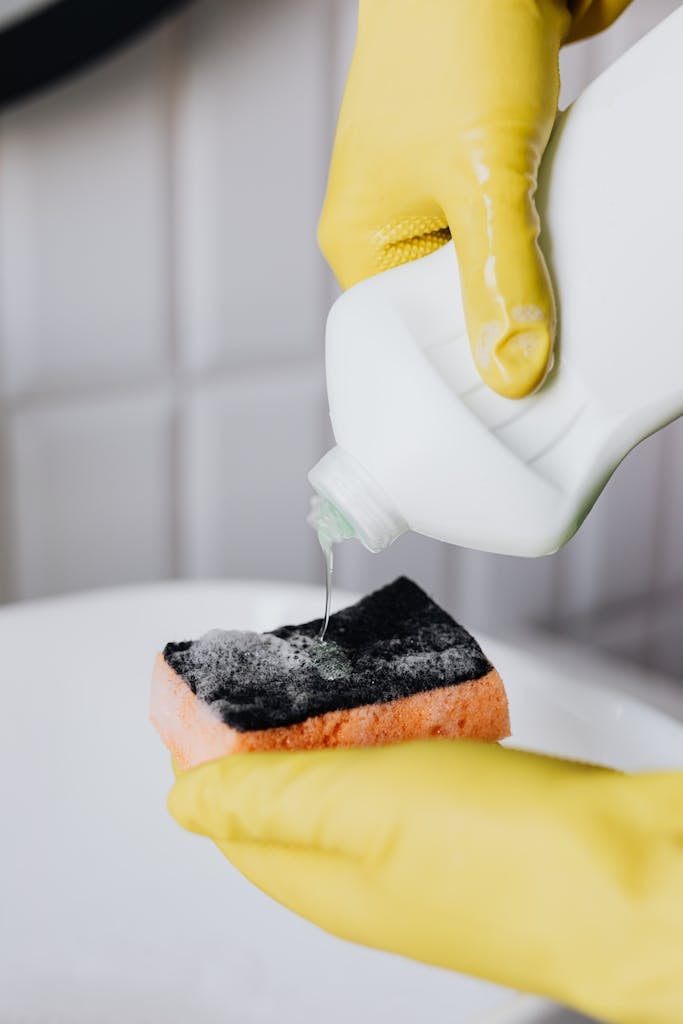
Washing Up Liquid: The Adhesive Enhancer
Washing up liquid, or dish soap, helps the mixture stick to plants better. It breaks the surface tension of the liquid, ensuring that it coats the leaves thoroughly.
Just a few drops will do the trick. This small amount is enough to make a big difference in how well your weed killer works.
Note: Avoid using products with too many chemicals. Look for gentle, biodegradable soap options for a safer garden solution.
Mixing Your Homemade Weed Killer
Before you start mixing your homemade weed killer, it’s important to consider safety. This mixture is simple to make, but you need to handle it carefully and use the right amounts. Here’s how to get it done right.
Safety Precautions Before You Start
Always wear gloves when mixing your weed killer. The ingredients can irritate your skin. Also, consider wearing goggles to protect your eyes.
Make sure you are working in a well-ventilated area. Avoid breathing in any fumes from the vinegar.
It’s best to keep pets and children away from the area where you are mixing.
Finally, have a container ready for storage. Use a plastic spray bottle to keep your mixture fresh and safe. Store it out of direct sunlight to maintain its effectiveness.
Proportions and Measurements
Getting the right proportions is key for your homemade weed killer. A common recipe uses:
- 1 cup of white vinegar
- 1 cup of salt
- 1 tablespoon of washing up liquid
This mix balances acidity and effectiveness. You can adjust these amounts based on your needs. Just remember to keep the same ratio.
For larger areas, simply multiply these amounts. If you make more than you need, store extra in an airtight container. Avoid metal containers as they can be corroded by the acid in the vinegar.
Mixing the right amount ensures that your weed killer will be strong enough to work, but not too strong to be unsafe.
Combining the Ingredients
Start by pouring 1 cup of white vinegar into a mixing container. Next, add 1 cup of salt. Stir the mixture thoroughly until the salt completely dissolves.
Once it’s mixed well, add 1 tablespoon of washing up liquid. This ingredient helps the mixture stick to the weeds better. Stir again until everything is combined smoothly.
Pour the solution into your spray bottle. It’s now ready to use. Just remember to shake it gently before each use to keep the ingredients mixed well.
Application Techniques
Applying your homemade weed killer correctly can make a big difference in how effective it is. Timing and methods are key to making sure you get the best results. Here’s how to do it right.

Best Times for Application
The best time to apply your weed killer is on a sunny day. The sun helps to enhance the effectiveness of the solution. Aim for late morning or early afternoon when the sun is high.
Avoid applying it during rainy days or when rain is expected soon. Rain can wash away your solution before it has a chance to work.
Also, don’t apply right before sunset. Plants need time to absorb the solution, and applying too late can limit this process.
Effective Spraying Methods
When using your homemade weed killer, a spray bottle is ideal for precision. Make sure to spray directly onto the leaves of the weeds you want to kill.
Avoid overspraying on surrounding plants to prevent damage. It’s important to focus on just the weeds.
For large areas, consider using a garden sprayer for quicker application. Mix your solution well before filling the sprayer.
Always wear gloves to protect your hands, and consider wearing a mask if you’re sensitive to strong smells. This will keep you safe while you work on your weed problem.
Aftercare and Prevention
Taking care of your garden after using homemade weed killer is important. You need to clean up properly and think about how to stop weeds from coming back.
Post-Application Cleanup
After applying your weed killer, it’s a good idea to clean your tools right away. Rinse your spray bottle and any brushes with water. This helps prevent any leftover solution from harming other plants.
If any mixture spills on the sidewalk or driveway, wash it off with water. Keeping your surfaces clean prevents damage.
You might want to keep an eye on the treated area for a few days. Watch for any new weeds or plants that may seem affected.
Also, if you notice any weeds that survived, you can reapply your mixture . Just be cautious and spot-treat only the weeds, avoiding nearby desirable plants.

Preventing Future Weeds
To keep your garden weed-free, consider using mulch. A layer of mulch can block sunlight and stop weed seeds from sprouting.
Aim for a thickness of about 2-3 inches for best results.
Another idea is to regularly check your garden. Pulling out weeds when they are small makes it easier to manage them.
Take a walk around your plants every few weeks.
You can also plant ground cover plants. They fill in empty spaces and compete with weeds for nutrients.
Choose plants that thrive in your area for the best results.